How to Add Fonts to Canva (Free vs. Pro, Desktop & Mobile)
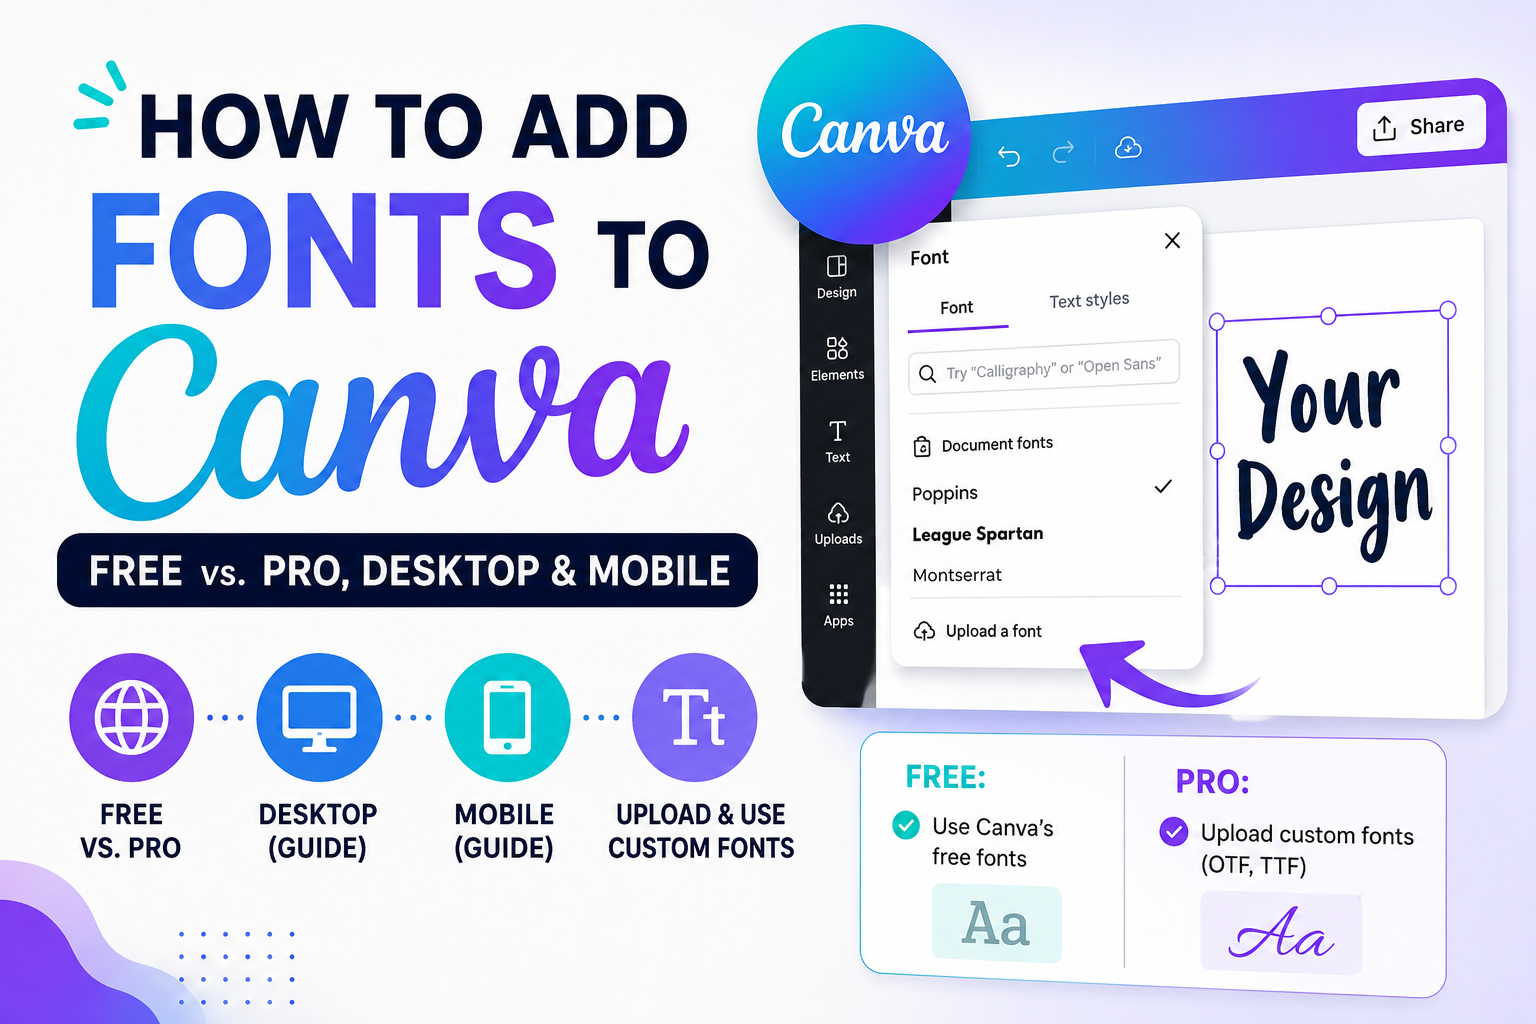
If you’re wondering how to add fonts to Canva, here’s the short version: you do it through your Brand Kit. Click Brand, open Fonts, hit Upload a Font, and pick a TTF, OTF, or WOFF file from your computer.
The catch is that custom font uploads only work on Canva Pro, Teams, Education, or Nonprofit accounts. If you’re on the free plan, you can’t upload your own font file, but you can still get extra typefaces through Google Fonts and, for platforms that don’t support embedded fonts at all, through copy-paste Unicode text.
That’s the whole answer. Everything below covers each method in detail, plus the free-plan workaround, mobile steps, and the fixes for when your upload just won’t go through.
Can You Add Fonts to Canva for Free?
No, not custom font files. Uploading your own font (a downloaded TTF, OTF, or WOFF file) requires Canva Pro, Canva Teams, Canva for Education, or Canva for Nonprofits. Free accounts are limited to Canva’s built-in library of 1,000+ fonts.
There’s one loophole: students, teachers, and registered nonprofits often qualify for Canva Pro or Canva for Teams at no cost, which unlocks font uploads without an actual subscription fee. If you don’t qualify for that and you’re not ready to pay, skip ahead to the Google Fonts and Unicode text sections below. Both get you new-looking typography without touching the Brand Kit.
What You Need Before You Upload a Font to Canva
- A Canva Pro, Teams, Education, or Nonprofit account. Free accounts won’t show the upload option at all.
- A font file in TTF, OTF, or WOFF format. Canva doesn’t support variable fonts, and it won’t take fonts zipped inside a folder, so unzip before you upload.
- A license that allows embedding. If the font’s license doesn’t permit embedding into another platform, Canva may reject the upload or flag it after the fact. Free fonts from Google Fonts and Font Squirrel are almost always safe here. Paid fonts from marketplaces sometimes need a Canva-specific version from the foundry.
- Separate files for each style. Regular, Bold, and Italic each need their own font file. One file gets you one style. Canva groups them together automatically if you upload them at the same time from the same folder.
Uploading the font is only half the job. If the project you’re designing is a resume, the font you pick matters just as much as getting it into Canva in the first place. Our guide on the best font for a resume breaks down which typefaces actually pass ATS scans and read well to hiring managers.
How to Add Fonts to Canva on Desktop (Brand Kit Method)
This is the main route, and it’s the one Canva points you toward in its own documentation.
- Log into Canva and click Brand in the left-hand sidebar.
- Open your Brand Kit (or create one if you don’t have one yet).
- Scroll down to Fonts and click Upload a Font (sometimes shown as a “+” or “Add New” button).
- Select your font file from your computer and click Open.
- Confirm you own the font or have the rights to use it. Canva requires this checkbox before it’ll process the upload.
- Wait for the upload to finish. It usually takes a few seconds per file.
Once it’s done, your font sits in the “Uploaded Fonts” section of every text box’s font dropdown, ready to use like any built-in Canva font.
How to Upload a Font to Canva Without Leaving the Editor
You don’t have to go through Brand Kit every single time. If you’re mid-design and want to add a font on the fly:
- Add or click into a text box.
- Click the current font name in the top toolbar to open the font dropdown.
- Scroll to the very bottom of that panel.
- Click Upload a Font, select your file, and confirm the license.
This uploads straight into your account’s font library without kicking you out of the design you’re working on. It ends up in the same place as a Brand Kit upload, so future designs can use it too.
How to Add Fonts to Canva on Mobile (iOS & Android)
The mobile process mirrors desktop, just with a different menu layout.
- Open the Canva app and log in.
- Tap the menu icon (three lines) in the top corner.
- Tap Brand, then select your Brand Kit.
- Scroll to Fonts and tap the “+” next to it.
- Tap Upload a Font, choose the file from your device, and confirm you have the rights to use it.
Fonts uploaded on desktop show up automatically in the mobile app and vice versa, since Brand Kit fonts sync across your whole account.
Uploading Bold, Italic, and Multiple Font Weights
This trips up more people than any other step. Canva can’t generate a bold or italic version from a single regular-weight file the way a word processor might fake it. Each weight is a distinct file, and you need to upload all of them for the full set to work.
| Style You Want | What You Need to Upload |
| Regular text only | One file (Regular weight) |
| Regular + Bold | Two separate files |
| Regular + Bold + Italic | Three separate files |
| Full family (Light, Regular, Bold, Italic, etc.) | One file per weight/style |
Put every file for that font family in a single folder before you upload, and upload them together. Canva groups matching styles under one font name automatically, and you’ll switch between them using the small arrow next to the font in the text toolbar. Upload them one at a time on separate occasions and Canva may not group them correctly.
Adding Google Fonts to Canva (the Free-Plan Alternative)
Google Fonts won’t get you a brand-new custom typeface inside Canva if you’re on the free plan, but many popular Google Fonts already exist directly in Canva’s built-in library under their original names. Search for the font by name in the font dropdown before assuming you need to upload anything.
If the specific Google Font you want genuinely isn’t in Canva’s library and you do have Pro access, the process is identical to any other font upload:
- Go to Google Fonts and download the font family you want.
- Unzip the download if it’s zipped.
- Go to your Canva Brand Kit and click Upload a Font.
- Select the downloaded file(s) and confirm the license (Google Fonts are open-source and licensed for this use).
Brand Kit vs. In-Editor Upload vs. Google Fonts: Which One to Use
| Method | Best For | Requires Pro? | Notes |
| Brand Kit upload | Setting a font for repeated, brand-consistent use | Yes | Fonts stay saved for every future design and every team member |
| In-editor upload | A one-off font you need right now, mid-design | Yes | Same result as Brand Kit, just faster in the moment |
| Google Fonts | Free-plan users, or anyone wanting an open-license font | No, if it’s already in Canva’s library | Check the built-in library first; most popular Google Fonts are already there |
| Unicode copy-paste text | Instagram bios, WhatsApp names, gamer tags, anywhere fonts can’t be embedded | No | Works on any platform, no account tier needed, generated instantly on tools like Font Style Pro |
Common Canva Font Upload Problems and Fixes
| Problem | Likely Cause | Fix |
| Upload button is missing | You’re on the free plan | Upgrade to Pro, Teams, Education, or Nonprofit |
| File won’t upload | Wrong format (zipped, or not TTF/OTF/WOFF) | Unzip the file and confirm it’s one of the three supported formats |
| Font uploads but license is rejected | The font’s license doesn’t permit embedding | Look for an alternative from Google Fonts or Font Squirrel, or request a Canva-compatible version from the foundry |
| Bold or italic won’t apply | You only uploaded the regular-weight file | Upload the Bold and Italic files separately, from the same folder, in the same batch |
| Font doesn’t show up after uploading | Page needs a refresh, or the file was corrupted | Refresh the browser or app, then re-upload if it still doesn’t appear |
| Font uploaded before July 2023 looks off or won’t group with new styles | Canva changed how it groups font styles | Re-upload the font with all its style files together |
| Teammate can’t see the font you uploaded | Only owners, admins, and brand designers can upload | Have someone with the right permission level upload it, or adjust team roles |
What “Licensed for Embedding” Actually Means
Every font comes with a license that spells out where and how you’re allowed to use it. “Licensed for embedding” specifically means the license permits the font to be packed into a file or platform (like Canva) so other people can view or edit designs using it, not just you on your own machine.
This matters because a font can be perfectly legal for you to use in, say, Photoshop, and still get rejected by Canva if the license doesn’t cover embedding. Google Fonts and most Font Squirrel fonts are licensed openly enough that this is rarely an issue. Paid fonts from boutique foundries are the ones most likely to need a special embeddable version, and if that happens, the foundry (not Canva) is who you’d contact to get one.
When You Don’t Need to Upload a Font at All
Font uploads only work inside Canva itself. The moment you copy text out of Canva and paste it somewhere else, like an Instagram bio, a WhatsApp status, a YouTube comment, or a game username, the custom font doesn’t travel with it. Canva renders fonts as part of the image, not as selectable text.
For those situations, Unicode-based stylish text is the actual fix, not a font upload. Tools like Font Style Pro convert normal text into stylized Unicode characters that paste and display correctly as real, selectable text on almost any app or platform, no design software or subscription required.
FAQ
Can you add fonts to Canva for free?
No. Uploading a custom font file requires Canva Pro, Teams, Education, or Nonprofit. Free accounts can only use Canva’s built-in library of over 1,000 fonts. Students, teachers, and nonprofits sometimes get free access to Pro-level accounts, which includes font uploads.
Why can’t I upload a font to Canva?
The most common reasons are being on a free account, uploading a zipped or unsupported file format, or uploading a font whose license doesn’t permit embedding. Confirm your account type first, then check that your file is TTF, OTF, or WOFF and properly unzipped.
Do I need separate files for bold and italic fonts in Canva?
Yes. Canva treats each font weight and style as its own file. To get working Bold or Italic versions, you need to upload those specific files, ideally all at once from the same folder, so Canva automatically groups them under one font name.
How do I upload fonts to Canva on mobile?
Open the Canva app, tap the menu icon, then Brand, then your Brand Kit. Scroll to Fonts, tap the plus icon, tap Upload a Font, and select the file from your device. It requires the same Pro-level account as desktop uploads.
What font formats does Canva support?
Canva accepts TTF (TrueType), OTF (OpenType), and WOFF (Web Open Font Format) files. It does not support variable fonts. Files need to be unzipped before uploading, and each style or weight must be its own separate file.
Can I use Google Fonts in Canva without Pro?
Often, yes, without uploading anything. Most popular Google Fonts already exist in Canva’s free built-in library under their original names, so search for the font first. Uploading a Google Font file yourself still requires a Pro-level account.
How many fonts can I upload to Canva?
Up to 500 fonts per Brand Kit. That limit resets per Brand Kit, so accounts with multiple Brand Kits can store more overall, though each individual kit is capped at 500.



One Comment